The diorama effect or “diorama illusion” is an interesting way to get a new perspective on your favorite photographic subjects. This type of photography takes real-life settings and makes them look like models through clever manipulation of the depth of field, lighting and more. If you'd like to learn more about the diorama effect – or you'd like to learn how to do it yourself – I'll show you everything you need to know about the diorama effect!
The History of Dioramas and Diorama Photography
When you look at the history of dioramas, you'll see a familiar name: Louis Daguerre, the father of the daguerreotype and modern photography. In addition to the daguerreotype, Daguerre also created the first dioramas. His dioramas, however, were quite different from modern models. His creations consisted of layered landscape paintings mounted on a turntable. People came to a specialized theater to watch as different lighting and color effects brought the moving paintings to life.
Today, dioramas are much less complex but just as beautiful. Visit a natural history museum and you'll see carefully modeled animals and scenery that is made to look like the real thing.
So how did the diorama illusion come about? It started with Hiroshi Sugimoto, a photographer famous for taking lifelike photos of museum dioramas. He realized that when you look at a diorama through the camera’s eye – and you omit anything that could anchor it to reality, like museum signs of the edges of the display case – you could make a photograph of a diorama look real.
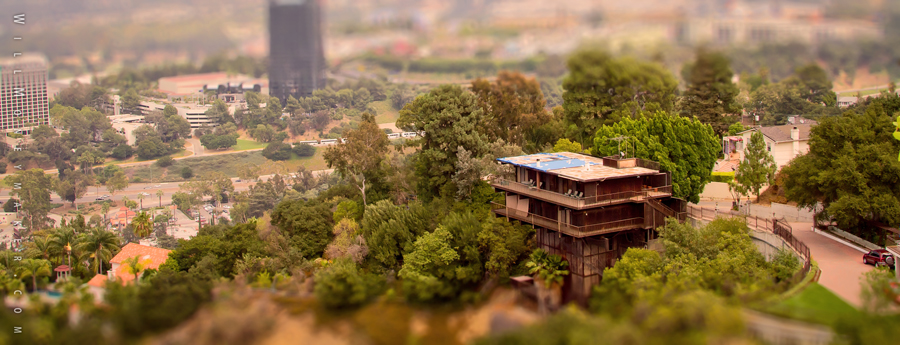
Today’s diorama effect works on that same principle but in reverse – photographers take images of real things, but they carefully manipulate the images to make the real thing look like a miniature or a model.
Why Create the Diorama Illusion?
The diorama illusion is something that I've always enjoyed. Many people would ask, “Why would you want to take something real and make it look fake?” I’ve found many answers to that question. For one thing, it’s fun! But more seriously, I think that employing the diorama effect gives us an entirely different perspective on the subject of the image. The subject matter takes on a different meaning, and because we're looking at it in a different way, we tend to examine the “miniaturized” subject a little more closely.
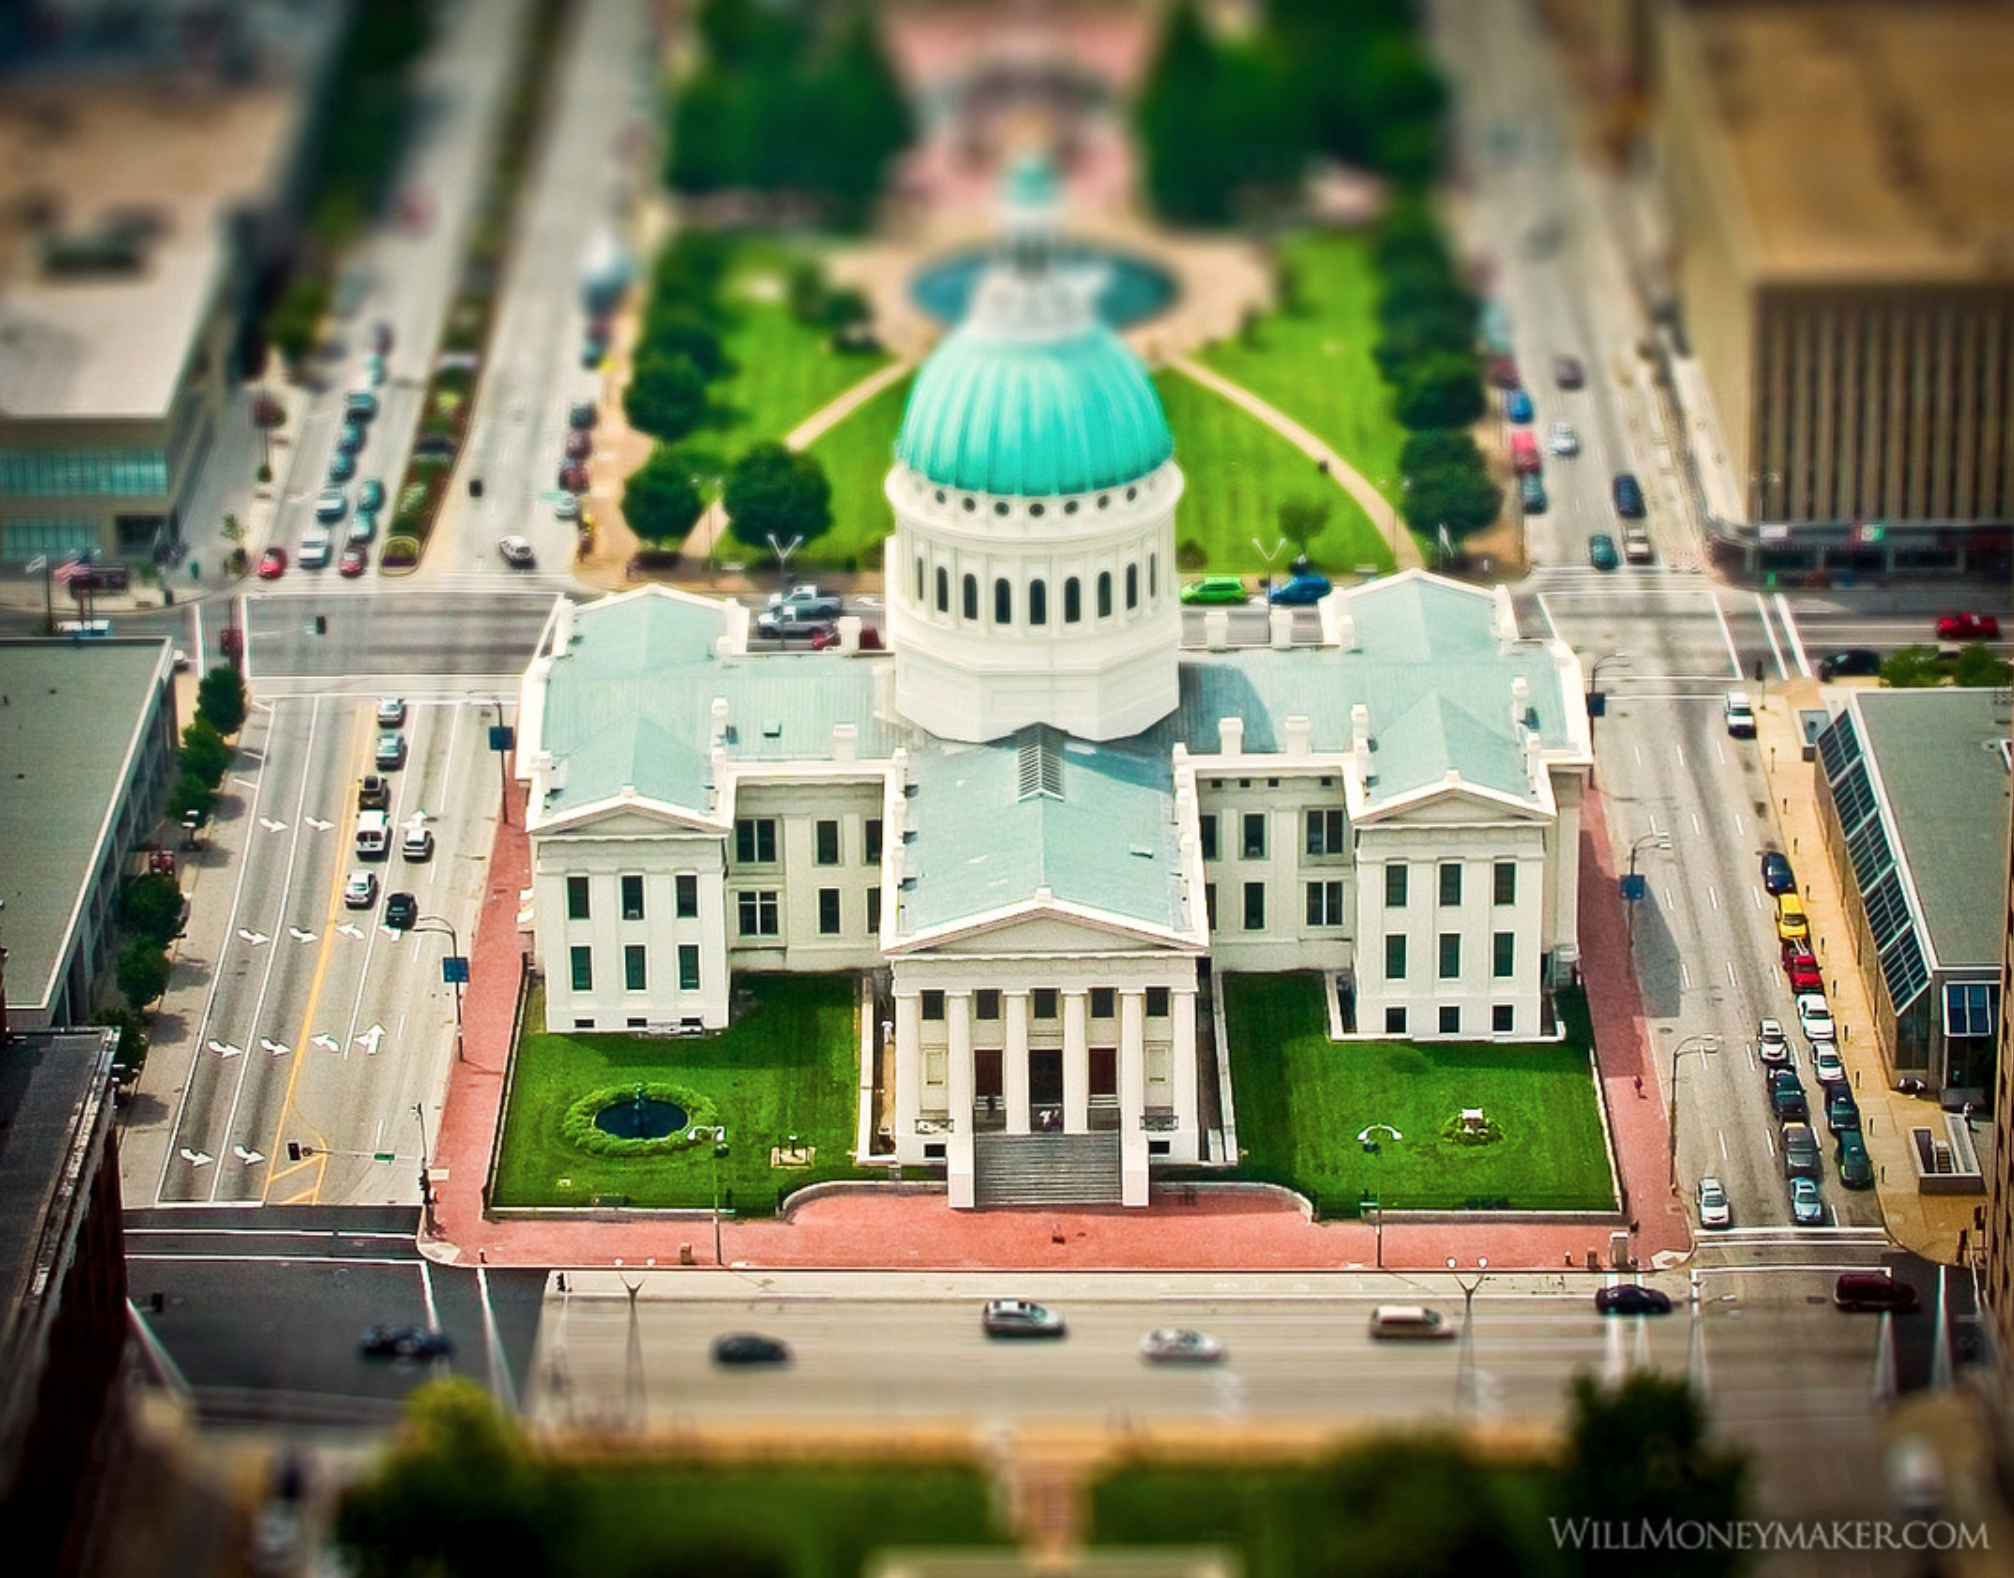
Such is the case with a photo that I took of the Old St. Louis County Courthouse. My family and I were on vacation, visiting the St. Louis Arch, and when I saw the courthouse, I knew that I had to use the diorama illusion to bring out this building’s old-fashioned charm.

Another time, on a school field trip, I found myself on a hillside overlooking Los Angeles and the Griffith Observatory. As I looked down at the Observatory, I knew that this was another chance to use the diorama illusion to add something new to an otherwise well-photographed scene.
How to Simulate the Miniature Look
The concept behind the diorama effect is a simple one. In essence, there are four factors that you'll use to create the miniaturized look. First, most models are viewed from above, and they're also viewed under lighting other than sunlight. Models and dioramas also tend to have brighter, less realistic colors, and because your eye is drawn to one element at a time – a building, a person or something else – your peripheral vision blurs the foreground and background. The following steps will show you how to use those four factors to create the diorama illusion with Photoshop and Topaz Lens Effects.
- Start by choosing a high vantage point in relation to the object you intend to photograph.
- Once you've taken the image, import it into your photo editing software to adjust the depth of field.
- In the Filter menu, scroll down to Blur and choose the Tilt-Shift filter.
- Use the cursor to click on the area that you'd like to keep in focus.
- Adjust the blur to your liking – normally 15 to 20 PX is sufficient.
- Click OK to apply the tilt-shift effect.
- Use either Photoshop’s lighting and saturation adjustments or the Topaz Labs Adjust plugin to adjust the image’s tone and brightness.
When finished, the original image of an everyday scene should look like a miniaturized model version of itself! And, if you don't have access to Photoshop, you can still create the diorama illusion using photoFXlab and the Lens Effects plugin from Topaz Labs!
The diorama effect is easy to apply to your images. Moreover, you'll find that the final image has a lot of character – more so than your average photo taken from a high vantage. The next time you find yourself looking down on an interesting building or cityscape, try creating the diorama illusion yourself!