We all assume that HDR (high dynamic range) photography got its beginnings in the digital era — that it is a construct born of the ability to freely take many different exposures of the same scene without worrying about wasting film and also the ability to easily and seamlessly layer those photos in photo editing software.
In actuality, HDR is far older. This type of photography comes from the very beginnings of the art form, with some of the first examples coming from Gustave Le Gray, who was creating HDR images as early as the 1850s. Even then, photographers knew that certain scenes were impossible to capture in one exposure. Gustav, in particular, fought to maintain proper exposure of both the sky and the sea in his famous ocean photography.
Because of this, he decided to start producing two images of these scenes. In the darkroom, the negatives were put together on one print, effectively extending the dynamic range of his images.

Then came the dodging and burning techniques — another thing that some assume came along with the dodge and burn tools in Photoshop, but actually stems from film photography. Make no mistake — dodging and burning is a type of HDR photography. Remember, HDR doesn’t necessarily mean that you need to layer images. It only means that you are extending the dynamic range past what the camera can capture in one exposure. It is the final product that you end up with, not the methods you used to get there.
Dodging and burning was a popular technique in the darkroom for decades. To dodge, a photographer used something to shield light when creating the print, thus lightening the shaded area. Burning involved exposing photographic paper to light longer so as to “burn in” more light, thus making an overexposed area, such as the sky, look darker.
Interestingly, HDR, whether through layering images or darkroom dodging and burning, was mostly done with black and white imagery. Although possible with specialized films, most felt it was just too difficult to dodge and burn or layer images to create HDR photographs with color film.
Along came Greg Ward, in 1993, to revolutionize HDR photography once more, this time ensuring that color photographs could become HDR images. He created an innovative digital file format, the RGBE file, which could be used to create tone maps in similar shots with different exposures so that you could merge the images.
By 2000, photo editing software designed specifically for creating HDR images, Photosphere, created by Ward, was released. Then, Adobe expanded HDR capabilities with the release of Photoshop CS2, which featured built-in HDR merging tools. From then on, tools to create HDR images have been standard in photo editing software.

Why Create HDR Photography
Now you know the history, but what about the application? A big misconception about HDR photography, in my opinion, is that it has a narrow application, only suited for landscapes. In reality, HDR photography is needed any time you cannot capture the full range of luminosity. If an exposure would have over or underexposed areas, then HDR is a tool that you can use to correct that.
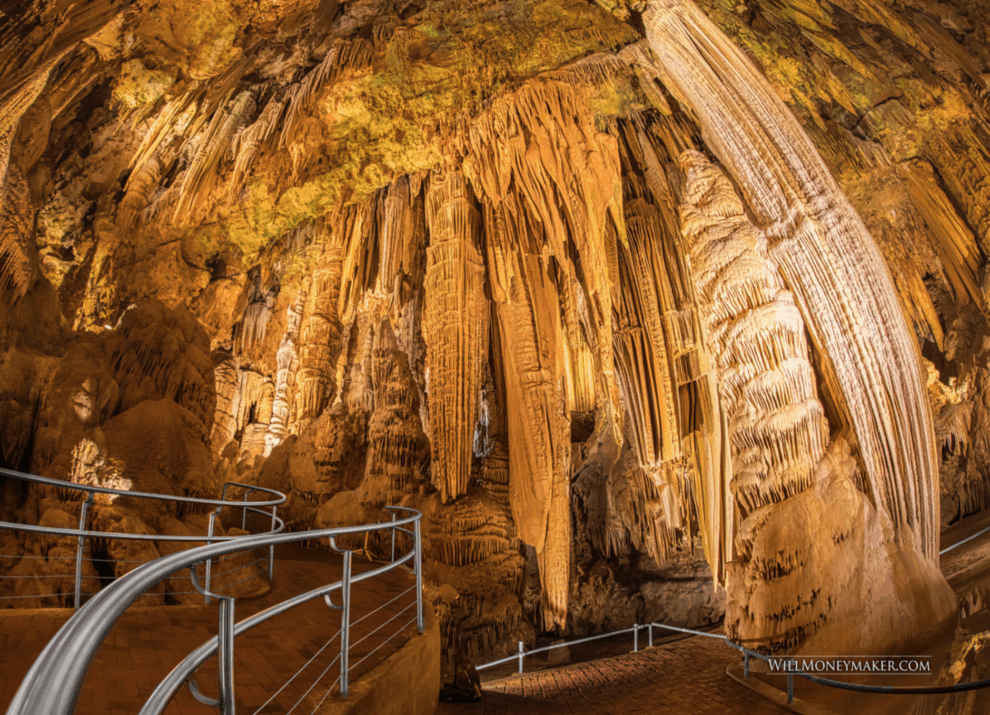
For instance, let’s say that you are indoors. Indoor photography is tricky — you often can’t capture everything between bright sparkling lamps or lighting all the way to shadowy corners. The solution to this is to bracket your images. Create exposures for the brightest of the bright, the darkest areas and everything in between, then merge those images later.
HDR Photography Can Also Be Surrealist
There are lots of photographers out there who eschew the types of HDR imagery that come across as wildly colorful, or the images that have odd halos or seem to have an over-sharpened look. However, if you can get past the over-processed look, then you will find that HDR photography is one of the best ways to create surrealist images. I find that this is particularly interesting given that it is very difficult to use a medium based on real-life imagery for impressionistic or surrealist purposes.
Where is this type of surrealism helpful? Anywhere that you want to create something fantastical. Maybe you are tired of regular images of sunsets, particularly those in which the foreground is underexposed and entirely black, creating a silhouette. This is a perfect opportunity to use HDR to make sure that the foreground is properly exposed while preserving or even enhancing a blazing, fiery sunset. Does it look a tad unrealistic? Of course, but if you want to create surrealist imagery, then that’s the point!
Similarly, HDR can help you to recreate old-fashioned images or it can help you to turn the interior of an otherwise ordinary building into something palatial. Of course, I do think that you need to remain careful — push the unrealism too far and people may be tempted to disregard the image as merely a cartoonish illustration.

Go Back to the Roots of HDR with Black and White
Finally, if you really want to create something amazing, you may enjoy creating black and white HDR images, just as the fathers of this photographic technique did. Here, you will not need to worry about going wild with colors. Instead, you can focus on what is really important: Creating an image with an incredible dynamic range, from the brightest sources of light to the deepest shadows. This is a great tool if you enjoy monochrome images with lots of texture and extraordinary contrasts.
As you can see, HDR imaging is not a modern concept. It is, however, experiencing a resurgence because modern technology makes it easier than ever to create these types of images. HDR is a useful tool, one that proves to be a lot of fun to experiment with. Experience a vast range of luminosity or use HDR to create surrealist images — the choice is yours.


